HoMM: Survivors, a Heroes 3 survivors game
The Shadow of Death 4.0Loading
HoMM: Survivors is a survivors game played in the browser under Heroes 3 rules. You steer one hero across a battlefield while waves of creatures close in, and the hero's banners, spells and war machines strike on their own. Between fights you spend what each run brings home on the buildings of the game's towns, so each day in the field leaves you stronger for the next.
Starting a realm
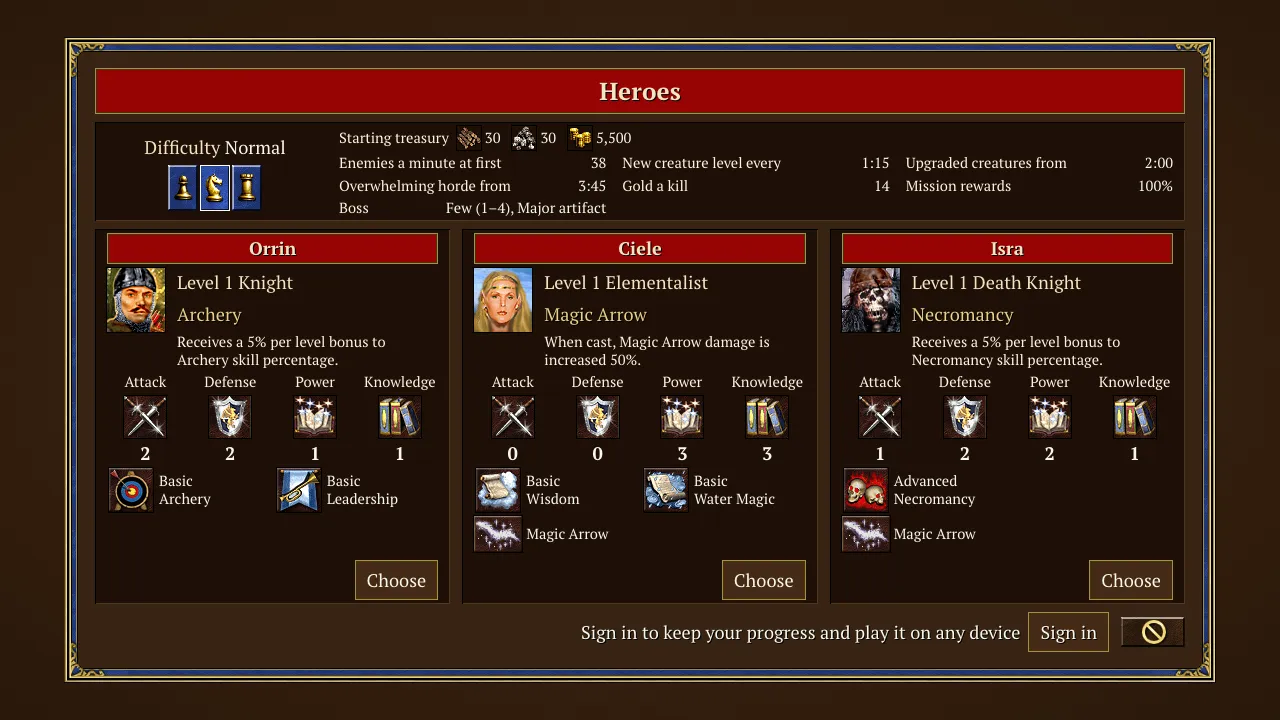
Choose Single player or Multiplayer on the title screen. In single player, choose a difficulty (Easy, Normal or Hard), then choose Orrin, Ciele or Isra as your first hero. Your realm is saved in this browser and, once you sign in, in your account as well. A run in progress survives a reload.
Your first solo fight is protected training. Stay on the field until its active-time clock is full to win automatically; tutorial windows pause the clock while you read. Later missions have their own objectives and require leaving through the exit gate.
Walk with WASD or the arrow keys, hold the mouse button to walk toward the pointer, or drag a finger on a touch screen. Nothing else in a fight needs a button, since banners, spells and war machines act by themselves. Esc opens the menu, where you can choose Resume, Main menu or Exit and adjust the sound volumes. The Pause button in the battle bar holds a single-player fight until you resume it.
The realm and its calendar
One run is one day of the realm's calendar. Seven days make a week and four weeks a month, as in the game, and the calendar moves on each time a run ends. A new week may bring the Week of a creature, which doubles the number of creatures in its banner and its upgrade's banner. A new month may bring the Month of a creature, which doubles the number of creatures in that banner for the whole month, or the Plague, which halves the number of creatures in every banner in the month's first week. The current event is named above the realm map. Each new week also brings new heroes to the Taverns and a new Seer's Hut quest.
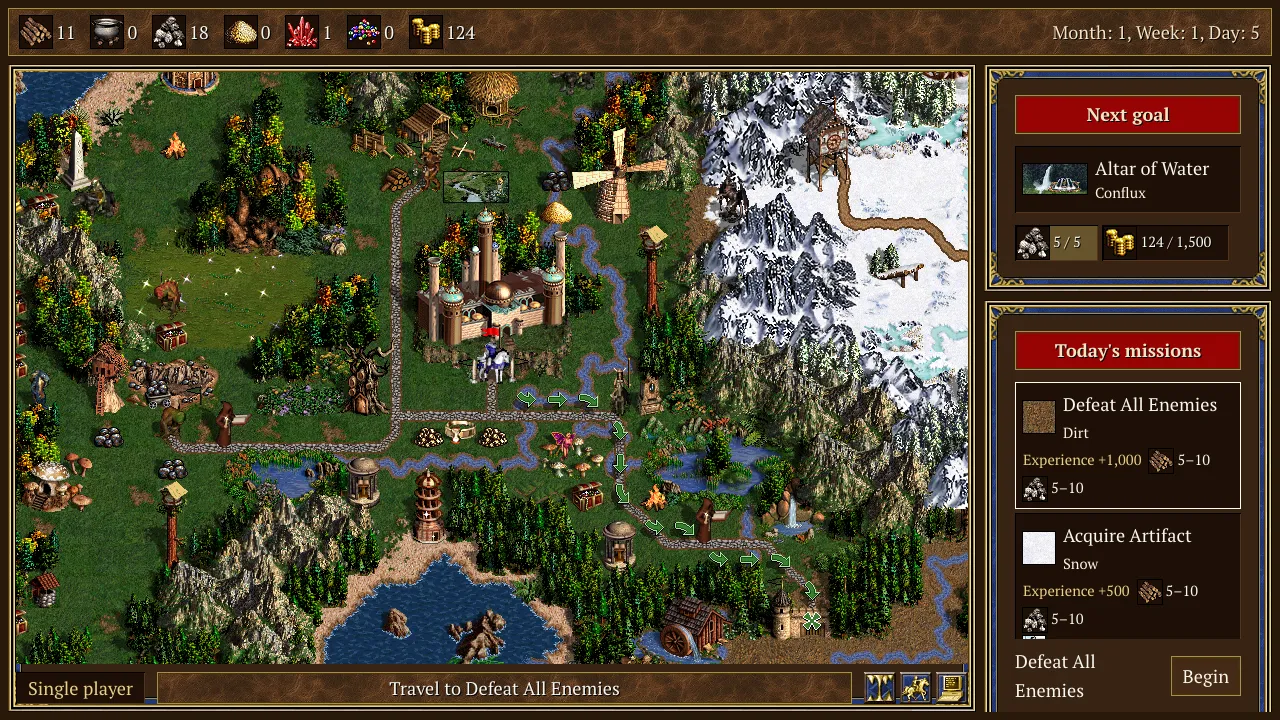
The realm screen's resource bar shows the treasury, the date and the income your buildings pay for a full day in the field. On a wide screen the realm is a Heroes 3 adventure map: the towns stand at their places, and each of today's missions appears at a site that shows what waits there, such as a monster, a mine, an obelisk, an enemy hero, a resource, an artifact or a town. Click a site to choose its mission and see the hero's path, then click it again to walk there and begin. The rail beside the map works on every screen width. It holds the next building worth funding with its cost compared with your treasury, today's missions with the Begin button, your heroes and the banners the realm lends you.
Choosing a mission
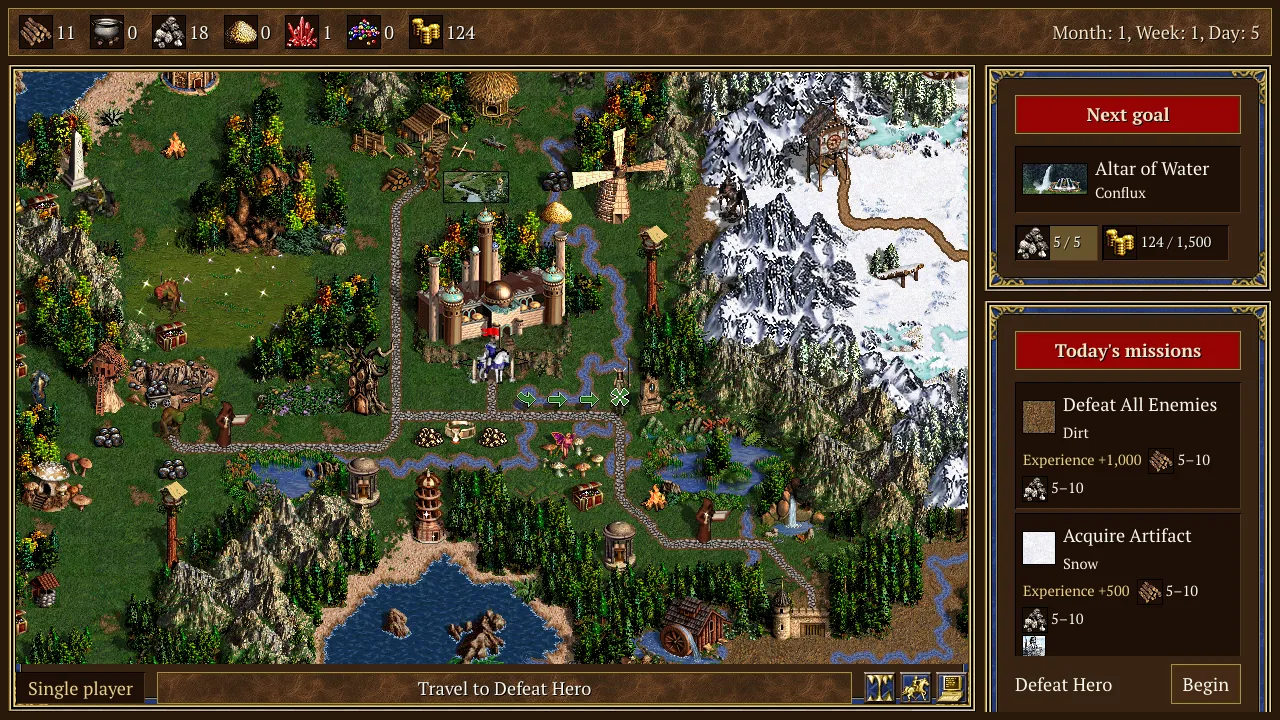
Each mission on the board names its terrain or town, what a win pays and who leads it. A win can pay experience, the wood and ore piles of its site, an artifact of a named class, the town's next building, the Grail or the week's mines. The terrain decides the enemy, because the waves bring creatures of the towns native to that terrain. Rest the pointer on a mission to see those towns and pick the fight your banners handle best.
The missions follow the game's own victory conditions. In Defeat All Enemies you hold out until the final host arrives in three parts from three sides, then slay all of it. Acquire Artifact sends a guardian carrying an artifact for you to take. Accumulate Creatures sets you hunting fleeing creatures; each one slain may leave a token, and you need the required number. Accumulate Resources lays out guarded piles of one resource one after another, and everything you gather comes home with you. Upgrade Town asks you to keep a town standing until its building is finished. Build a Grail Structure has you visit obelisks, each narrowing the dig site, then stand on the site until the Grail is found. Defeat Hero brings an enemy hero who casts spells and leads an army. Capture Town is won by standing in the town until you hold it. Defeat Monster requires slaying a monster stack, while Flag All Mines requires standing on mines until the required number fly your flag. A town's Upgrade Town and Capture Town appear on the board once that town has a Fort.
Inside a run
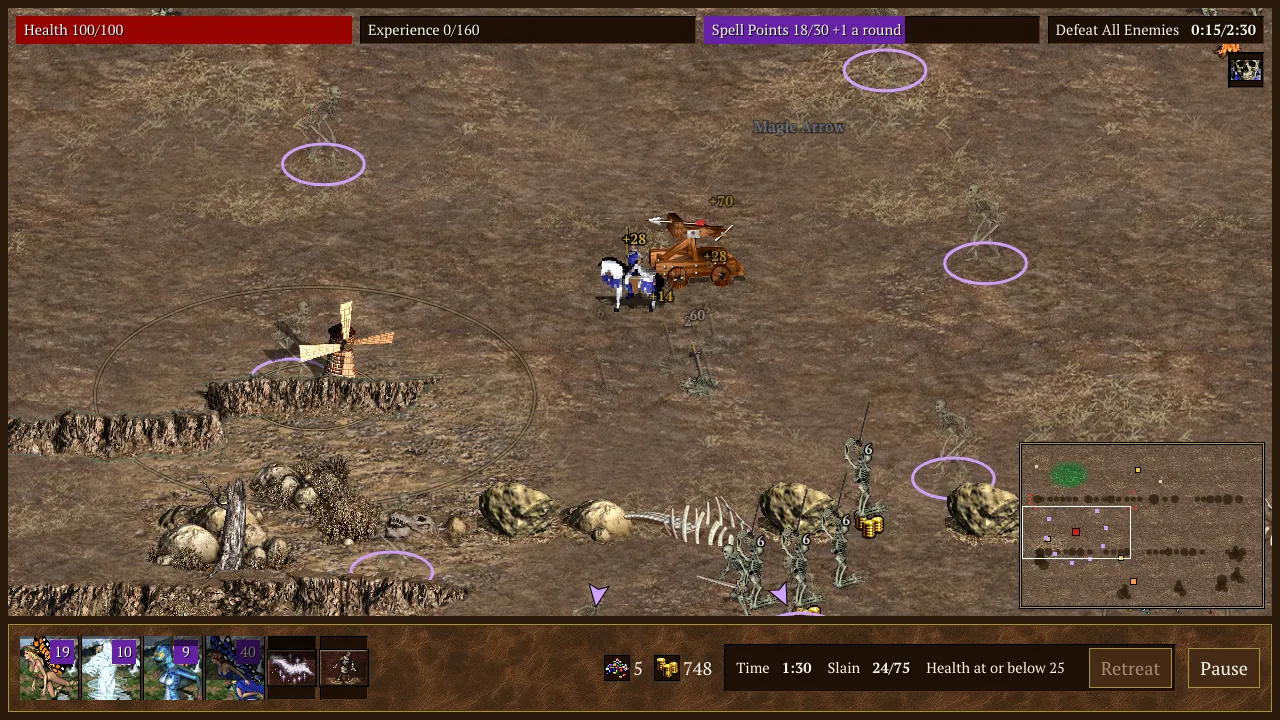
Inside a run the field fills over time. Creatures arrive in groups, creatures of a higher level join at regular intervals, and the first group of each new level is marked on the ground with a ghostly image of its creature a few seconds in advance while the battle bar names it and counts down. An arrow on the edge of the view points to any marked arrival you cannot see. From fifteen seconds in, a ring of creatures is marked around the hero at regular intervals and closes three seconds later. The ring is open ahead of a walking hero, so you walk out through the gap, while an immobile hero is surrounded. From the third new level on, the horde swells until no hero can hold the field, so finish the mission before it comes: the difficulty window shows when.
Movement decides the fight. No ordinary creature walks faster than the hero, and leaders such as a boss, a guardian or an enemy hero walk slower still and take twice as long to wind up their blows, so stepping away before a blow lands dodges it. A creature strikes when it reaches the hero and again while it stays in reach, and enemy shots fly toward where the hero stood, so walking sidesteps them. The blows of any one second take at most 30% of the hero's Health, so a fall takes three seconds of blows. A round lasts six seconds, and each round in which the hero walked at least half the time and was not hit restores 8% of Health, while a hero who stands still recovers nothing beyond what a First Aid Tent gives.
Banners, spells and war machines
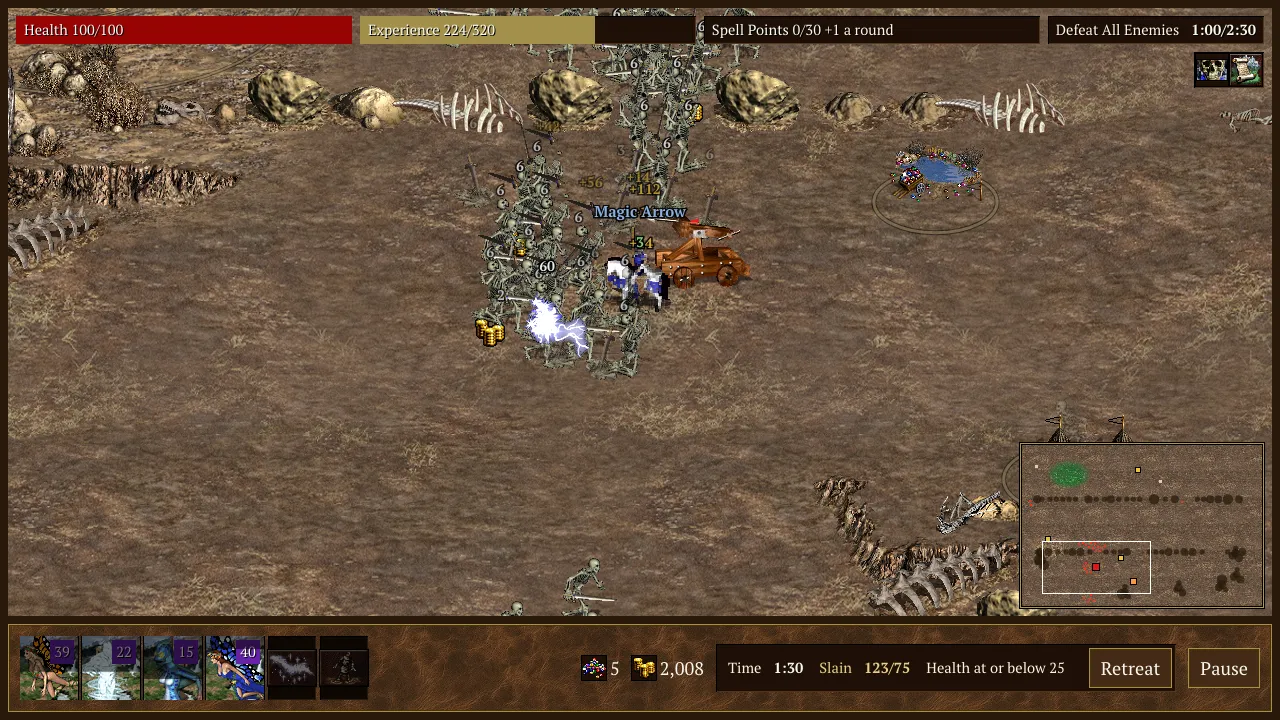
The hero fights with three kinds of power. Banners are the army: once a round each banner's creature appears beside the hero, strikes the nearest enemy in its reach with its own attack and fades, and a strong strike carries on from the slain creature into others of its kind nearby. Shooters fire their own projectiles until their shots run out, then fight in melee. With a Spell Book, every spell the hero knows casts automatically whenever the Spell Points cover its cost and a target is in reach; the pool holds ten points for each point of Knowledge and refills one point a round, more with Mysticism. War machines come from a  Blacksmith: a Ballista fires on its own, a First Aid Tent heals the hero every round, and an Ammo Cart gives shooting banners unlimited shots.
The battle bar
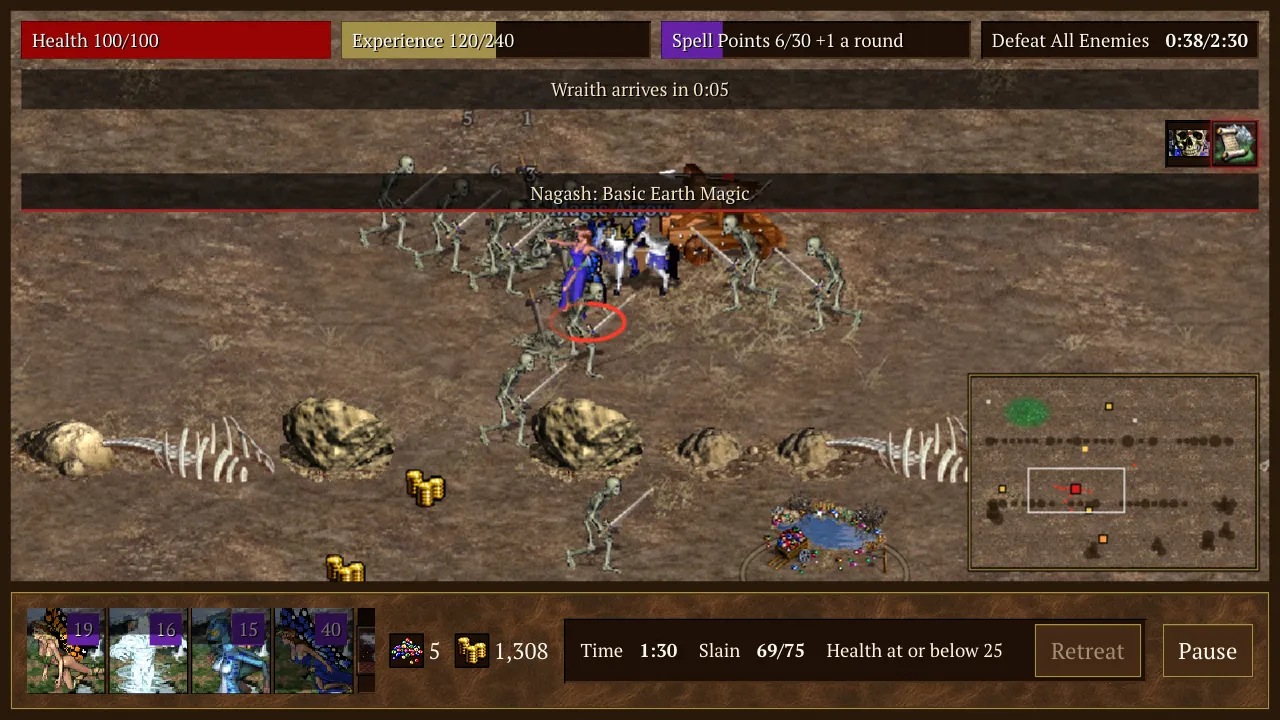
The battle bar shows what you need while dodging. Along the top run the Health, Spell Points and Experience meters, the mission's name with its progress toward the goal, the run's clock and the warnings of what is coming. Below them sit the resources you carry, a slot for each banner and spell that fills as it recharges, the conditions for unlocking Retreat, and the Pause, Retreat and Surrender buttons. Rest the pointer on any part to read its help.
Gold, experience and levels
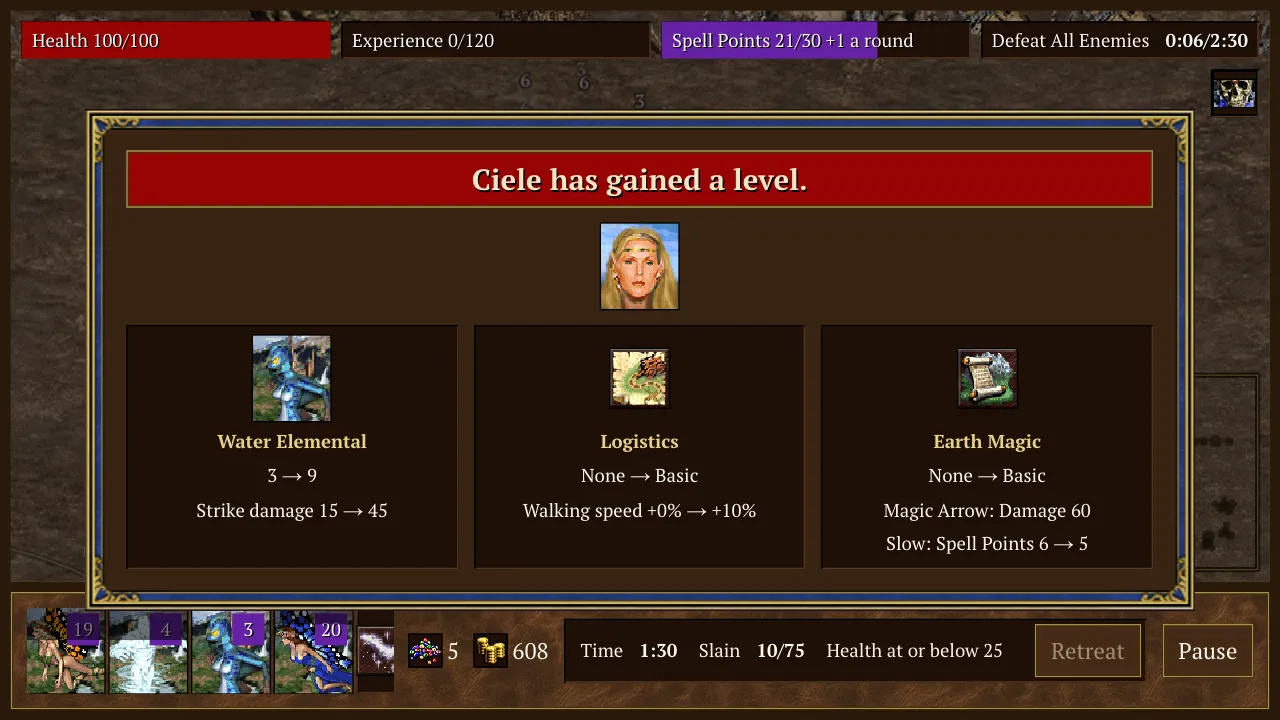
Every kill drops gold, and the kill's experience lies in that pile, so the hero earns it only by collecting the pile: walking over it, or coming close enough that it flies to the hero. Piles of one kind that lie close together merge, and Scouting widens the reach from which piles fly in. Each level the hero gains in a run offers three cards: a new spell or more creatures for a banner, the next rank of a skill the hero holds, and a new skill drawn by the hero's class. A card states the figures it changes in this run, such as a banner's strike damage or a spell's damage and cost, and nothing is offered that the run cannot use. These picks last for the run only. The run's experience is also banked on the hero, raising their permanent level.
The exit gate
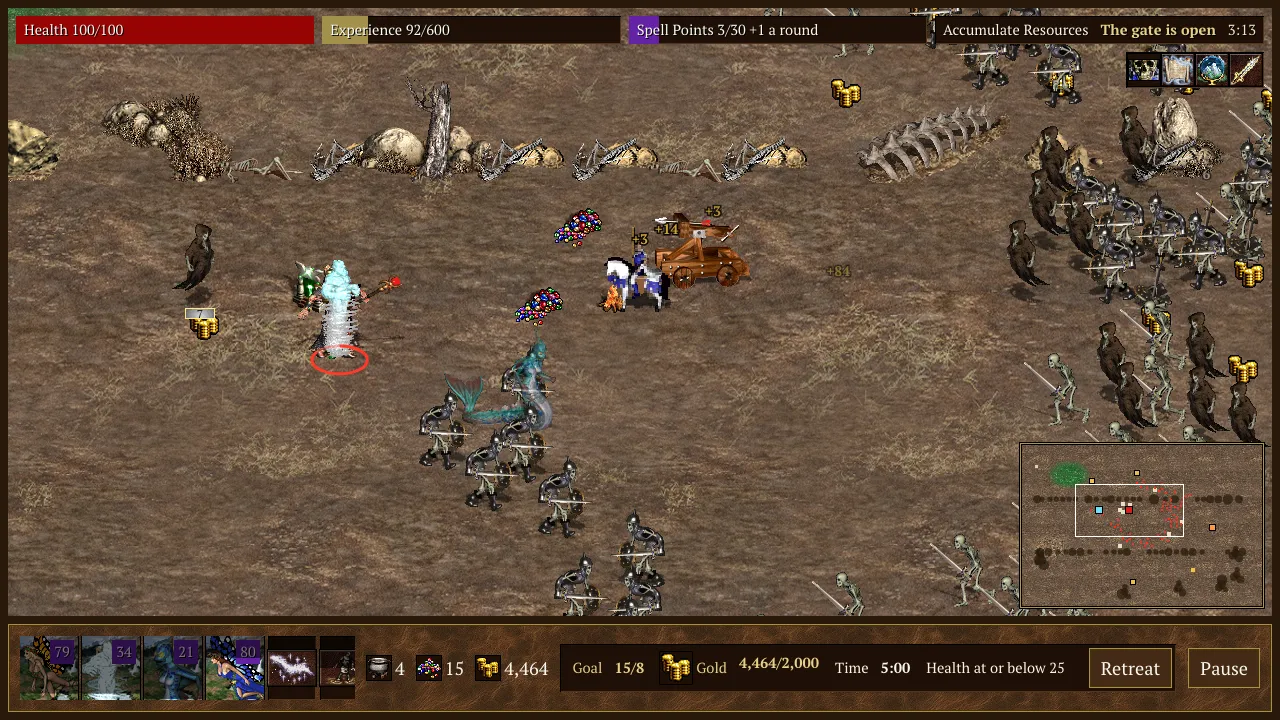
When the mission's goal is done, an exit gate opens a short walk from the hero, and an arrow on the edge of the view points to it. A stack of the field's strongest creatures guards it and arrivals come twice as fast while it stands open, so head there at once; coming within two hexes of the gate takes the hero through. The gate brings home everything carried and the mission's reward.
Retreat, Surrender and falling
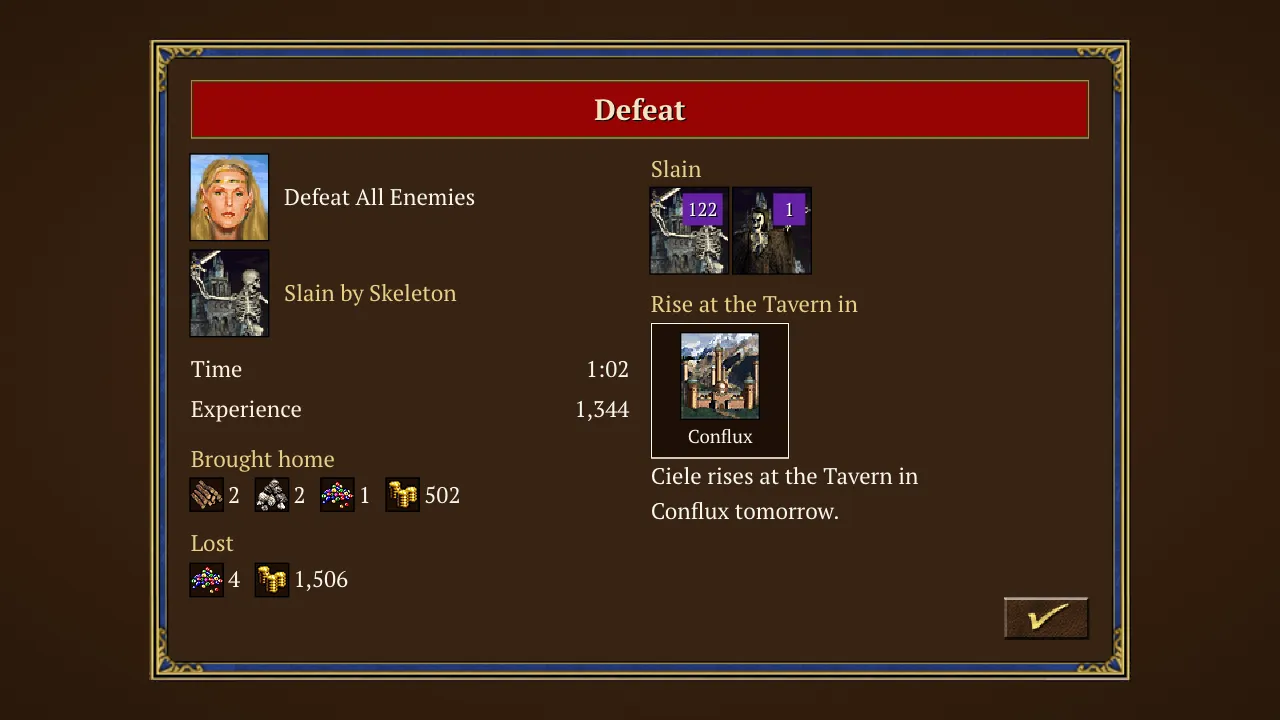
Retreat ends a run early. The battle bar lists what readies it on each mission, such as time survived, the leader's arrival, part of the goal, a number of kills or the gold carried, and on every mission it is ready once the hero's Health falls to a quarter. Retreat keeps the hero, the run's experience and half of what is carried, without the mission's reward. While an enemy hero stands on the field you may also Surrender, which costs gold according to the banners you lead, is paid from your carried gold and the treasury, and keeps everything carried. A hero who falls loses the mission's reward and brings home a quarter of what was carried, but keeps the run's experience and every artifact found. The result window then lets you pick the  Tavern where the hero rises, ready for the next day.
The day's report
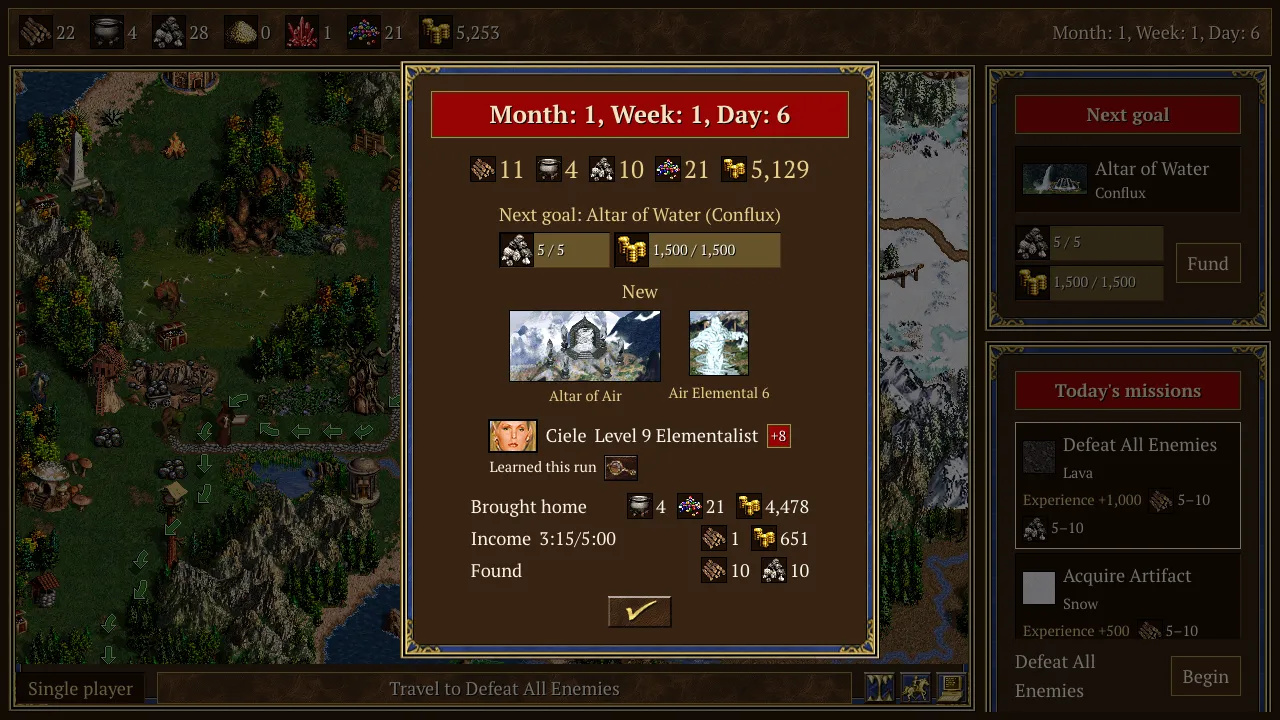
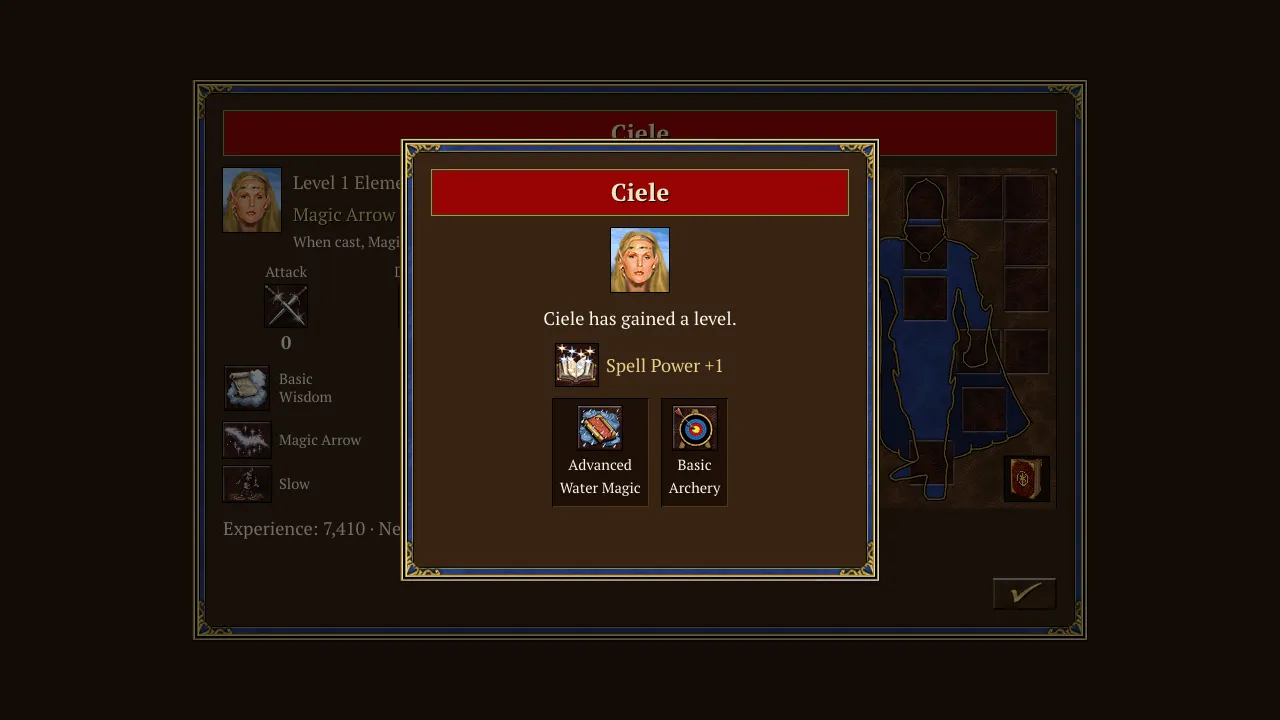
Banking a run closes the day. The day's report leads with what the treasury gained, then tells where a fallen hero rose, which buildings were completed and which new banners the realm lends, how each hero grew, how the run paid and what the new week brings, including the heroes now waiting in the Taverns. Every level reached with the banked experience then opens the game's level-up window, where one primary skill rises and you pick one of two secondary skills. A level you leave untaken waits at the +N marker in the hero list.
Funding the towns
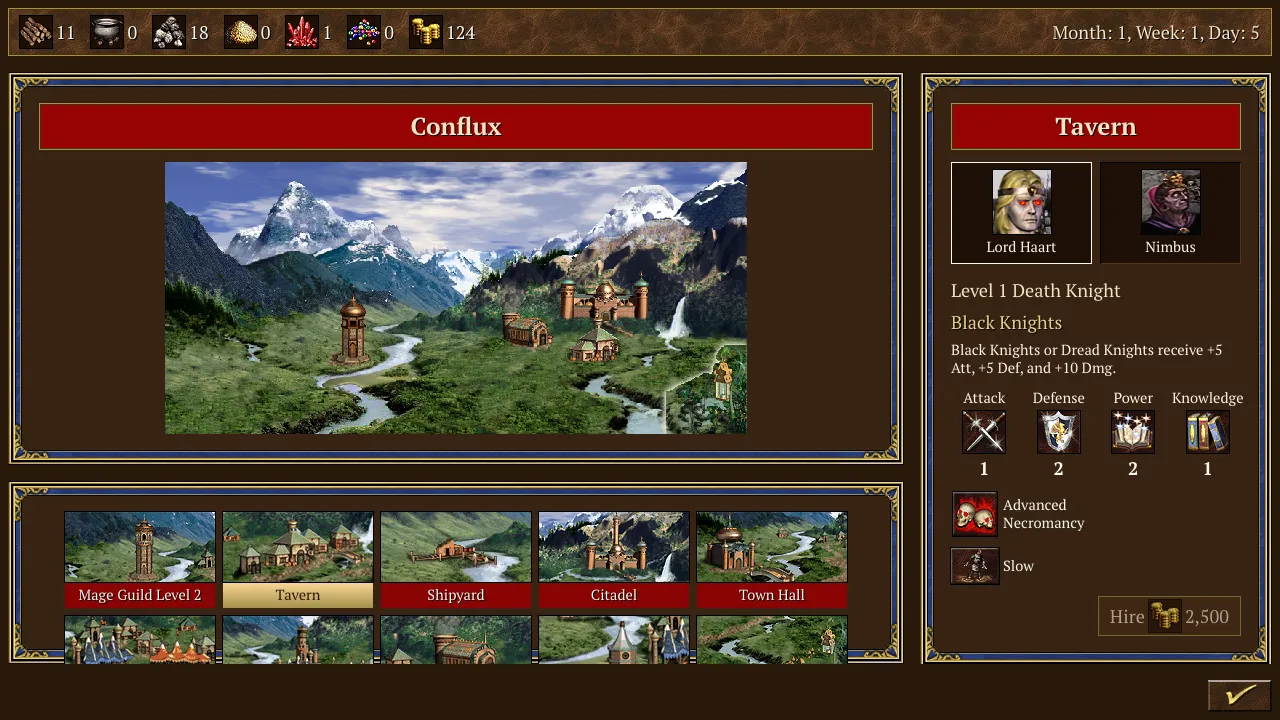
Between runs you fund the towns. You own none of them: each building is paid for from the treasury at its price in the game and needs the same prerequisite buildings. Selecting Fund pays for a building together with every prerequisite it still lacks. A town completes one funded building per day: immediately if it has not built that day, then one queued building on each following day. Different towns can build on the same day. Open a town from the row of town portraits or from the map to see each building's cost, what it still needs and what it does in Survivors.
A dwelling lends its creature to the hero as a banner, as many creatures as the dwelling's weekly growth. An upgraded dwelling lends the upgraded creature, a Citadel increases growth by half, a Castle doubles it, and a horde building adds its own number. A hero carries up to seven banners, one for each of the game's seven army slots, and the hero's own starting troops fill slots too; a lent creature the hero already leads joins that stack instead of taking a new slot. Choose which lent banners to take in the rail before you begin.
What town buildings give
A Blacksmith lends its town's war machine. A Tavern offers two heroes for hire at 2,500 gold each, new every week, and gives a fallen hero a place to rise. Town Hall, City Hall and Capitol pay gold after every run, in full after five active minutes in the field, which make a whole day, and proportionally after a shorter run. A Marketplace trades resources between runs, and a Resource Silo adds resources after every run. A Fort opens that town's Upgrade Town and Capture Town missions, and each town's special buildings add a perk of their own, shown on the town screen.
A Mage Guild adds its spells to the pool offered when you gain levels during a run, whichever town it stands in. It also teaches its spells to a hero with a Spell Book, in the hero's own town (where the hero was hired, last rose or first arrived) and in the town an Upgrade Town or Capture Town run starts from. Spells of the first and second level need nothing more, and each rank of Wisdom allows spells one level higher, both for the guild and for the cards of a run. A hero without a Spell Book buys one for 500 gold in the hero window once any town has a Mage Guild.
Heroes
Heroes keep their level, primary and secondary skills, Spell Book and spells, artifacts and starting troops from run to run. Health is 100 plus 10 for each point of Defense, Knowledge determines the Spell Points pool, the hero's Attack and Defense add to every banner strike and guard against every blow as in the game, and Spell Power sets how hard spells hit and how long they last.
Artifacts
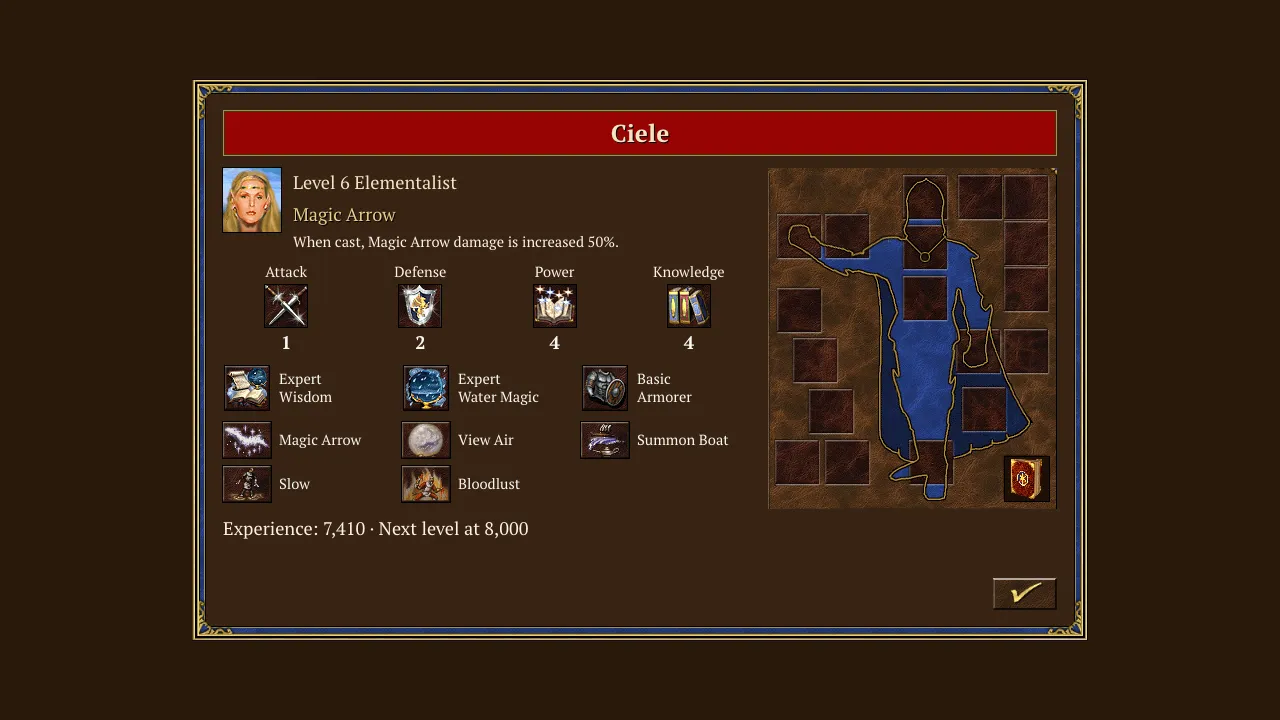
Artifacts come from a guardian's prize, the rewards of Defeat Hero and Defeat Monster, creature banks, some adventure objects and the beaten enemy hero, and Artifact Merchants sell them in towns that have built them. A new artifact goes to the hero's backpack and takes effect only when equipped: open the hero window and put it in a free equipment slot of the right type. When the hero wears every part of a combination artifact, you can assemble it.
Encounters
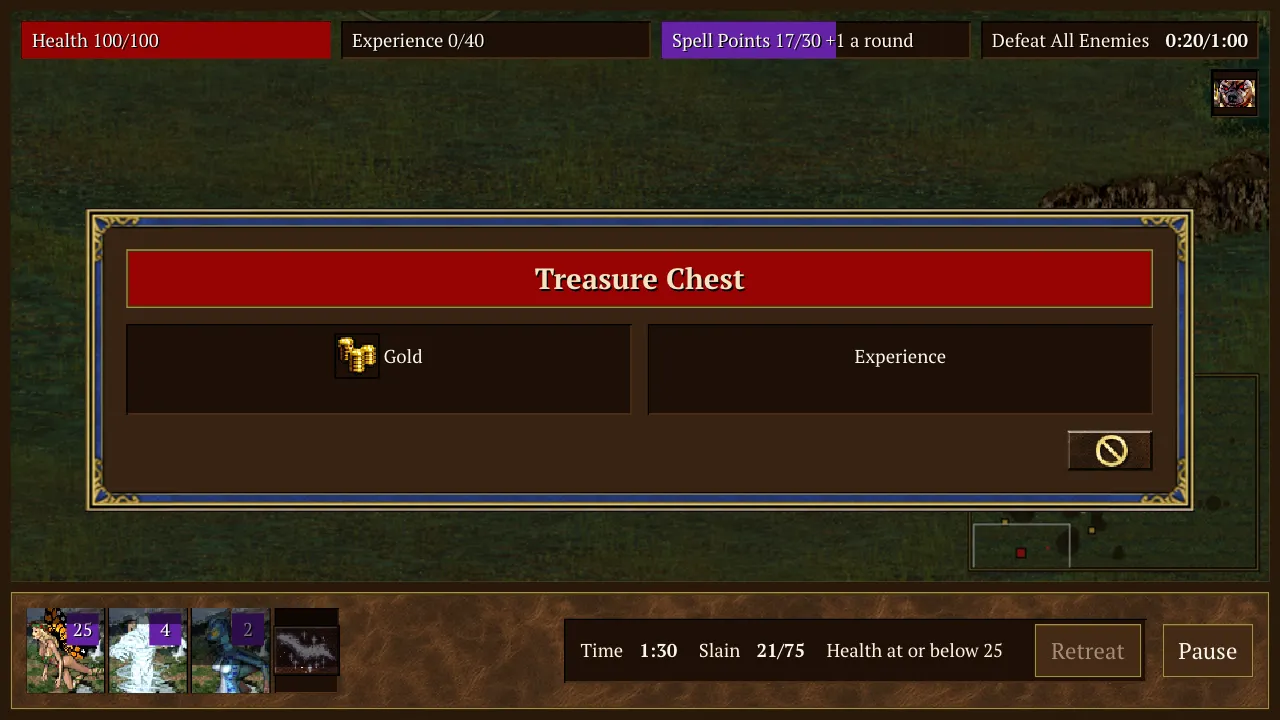
Runs also hold encounters off the mission's path. Adventure objects stand on the field, and walking onto one visits it; an encounter that offers a choice or asks for payment pauses a single-player fight as a level-up does. Some objects can be visited only once per hero, others once a run. In some runs a creature bank opens after 45 seconds as an optional elite fight: stepping into its ring calls its guards, and clearing them pays resources and artifacts and may lend its reward creature as a banner for the next seven days. Each week a Seer's Hut in a town with a Tavern offers one quest, counted over that week's runs. The enemy hero of Defeat Hero stays with your realm until beaten. Each win against you makes that hero stronger and adds what you lost to their hoard. After their first win, they may appear in other missions, which the board marks. Beating them pays out the hoard with an artifact.
Multiplayer
In Multiplayer you sign in, then create a world with an optional password or join one at any time. A world holds up to eight players online. It shares its towns, calendar, Grail pieces, enemy hero and Seer's Hut quests, while every player keeps their own heroes, artifacts and treasury and funds the shared towns from it; a hall upgrade pays the player who funded it. Up to eight heroes play one mission together in one arena, and a player may join a run in progress at its gate. The pressure grows with the party, and every kill's gold and experience reach every hero alike, so nobody races for kills. An ally who stands beside a fallen hero for six seconds revives them, and a fallen hero left alone for half a minute dies. Each player leaves through the gate, retreats or surrenders on their own, level-up cards never pause a party fight, and the world's day moves on when the party's run ends.
A strong start
For a strong start, choose the first hero by how you want to fight. Orrin, a Knight from Castle, starts with Basic Archery, Basic Leadership and a specialty that raises Archery every level: shooting banners and the Ballista hit harder, and Leadership raises the chance of an extra strike. He leads Pikemen, Archers and Griffins and has no Spell Book, so his banners are his strength. Ciele, an Elementalist from Conflux, starts with 30 Spell Points, Basic Wisdom, Basic Water Magic and Magic Arrow, which her specialty makes half again as strong, and leads Pixies, Air Elementals and Water Elementals. Isra, a Death Knight from Necropolis, starts with Advanced Necromancy and Magic Arrow. Her specialty raises Necromancy every level, and creatures she slays rise as Skeletons that join her Skeleton banner for the rest of the run. The first hero arrives in that home town, whose Tavern already stands.
On Easy, the treasury starts with 7,500 gold, 30 wood, 30 ore and 2 of each rare resource; on Normal, with 5,500 gold, 30 wood and 30 ore; and on Hard, with 2,500 gold, 15 wood and 15 ore. Harder difficulties send more creatures and sooner. Mission rewards are the same on every difficulty; each kill drops 25 gold on Easy, 14 on Normal and 8 on Hard.
Make a dwelling your first goal, since its banner strikes every round of every run. Every dwelling needs its town's Fort (5,000 gold, 20 wood, 20 ore), and after the Fort a town's first dwelling costs only 200 to 500 gold and 10 more units of wood and ore combined. After the first fight, you can fund buildings on the realm screen. Easy and Normal start with enough resources for the home town's Fort and first dwelling if you spend them on nothing else. Fund the dwelling itself and its missing prerequisites are paid with it: the Fort stands at once if the town has not built that day, and the dwelling follows on a later day. Hard asks the first runs to bring home the missing resources.
The home town's first dwelling lends the same creature as the hero's first starting stack, so it makes that stack larger. A first dwelling in another town adds a new banner that strikes on its own; Stronghold's is the cheapest, at 5,200 gold, 25 wood and 25 ore together with its Fort.
Keep moving from the first second. Walking is both your defense and your healing, and circling the field picks up the gold piles that carry the experience. When a ring is marked around you, walk on through the open gap ahead. Step away from a leader rather than standing in its reach: it walks slower than the hero, and its long wind-up shows each blow coming.
Leave through the gate whenever you can, because only the gate brings home everything carried along with the mission's reward. When Retreat becomes ready because Health has fallen to a quarter and no open gate is near, take it: Retreat keeps half of what you carry, while a fall keeps a quarter.
Plan around the week. Take Flag All Mines early in a week, since flagged mines pay after every run until the week ends. During the Week of a creature whose banner you borrow, that banner strikes with twice the creatures. Each town completes at most one building per day, including a building completed by winning Upgrade Town.
Build a Mage Guild in your hero's own town when you want spells. Mage Guild Level 1 costs 2,000 gold, 5 wood and 5 ore, and Ciele and Isra learn its spells at the start of the next run; Orrin first needs a Spell Book for 500 gold. The guild and the dwelling path draw from the same treasury, so choose which to fund first. Level 2 needs 4 of each rare resource, which Accumulate Resources, creature banks and adventure objects bring home, and spells of the third level need Wisdom, which Ciele already has.
Hold off on a second hero at first. Only one hero takes the field each day and a run's experience goes only to that hero, so the 2,500 gold hire cost is half the price of a Fort. A hero learns from the Mage Guild of the town where they were hired or last rose, so hire where the guild suits them, and when a hero falls, pick the Tavern in the town whose guild you want them to learn from.